Beginners DIY Tips to hanging a Wallpaper Wall Mural at home
As a beginner myself I decided to document the steps to hanging a wallpaper wall mural. This was the second mural I’ve hung and I promise if I can do it, anyone can!
I hope the tips I include in this blog help anyone else thinking taking the plunge and doing it themselves.
So firstly, what is the difference between a Wallpaper Wall Mural and Wallpaper?
Murals as a general rule are applied to one feature wall in a room, where Wallpaper is usually applied to more, sometimes all four walls (even ceiling if you are feeling super brave!).

Typically, wallpaper adds a visual interest to a room or ties together other elements of your room design.
Wallpaper isn’t necessarily going to be the focal point of a room, where a Wallpaper Wall Mural might be.

The other difference with a mural compared with wallpaper is the wall mural is sent to you in numbered sections which you hang in order, eliminating the need for matching the pattern repeats! I’ll explain this more in a moment.
~ What you’ll need ~
• Step ladder
• Tape measure
• Pencil
• Spirit level
• Plumb line
• Metal ruler if you have one
• Sharp Stanley knife – it’s really important that it’s super sharp.
• Wallpaper brush
• Paint brush
• Screw drive (for plug socket removal)
• Bucket
• Sponge (new!)
• Whisk
• Scissors
• Roller
• Paint tray for roller
~ So let’s get started with my Step by Step guide ~
1. Ordering your wall mural
First, you’ll need to get your tape measure out and measure up.
Measure the width and the height of the complete wall. If you’re going to paper a wall that has different heights, for example, a staircase or a sloping ceiling, always measure the highest and widest point to ensure you cover the whole wall.
My mural is from Rebel Walls and they always produce your mural in the exact measurements you specify, so they recommend you add 5 cm (2 inches) to the measurements in case the wall is uneven.
If you’re mural covers a corner of a room then Rebel Walls recommend you add 5 cm per corner and 5 cm on the height.
For example, if you’re going to hang a mural across 2 walls in a room, add 5 cm per wall. Meaning you should add 5 cm on the height and 10 cm to the width.
Measure again again and once more! You really don’t want to get this bit wrong!
Then you simply add your wall dimension into their website or pass them onto your local stockist for them to order for you. I ordered my mural through my local supplier “The Interior Shop” based in Chester.
(It’s worth noting here that wallpaper paste is included when ordering through Rebel Walls)
2. Preparing your walls
Remove any existing wallpaper and take out any nails or picture hooks that you will no longer be using and fill the holes.
Fill any other holes on the wall and allow the filler to dry before sanding. It’s a good idea to run your hand over the wall to feel for any lumps and bumps that might need sanding.
Once your wall is smooth, you’ll need to clean it to remove any grease. I used a sugar soap spray and a sponge.
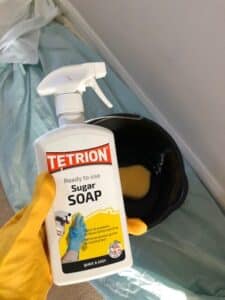
Allow the wall to dry. (You could do this job the day before!)
Now, a lot of instructions I read on the internet said that if you are waiting for the wall to dry this is the time to mix your paste, but I think measuring up for your first sheet of paper is something you need to take your time over, so I did this first.
(Once you’ve mixed your paste it says you need to mix it again after 15 mins and having that hanging over me whilst trying to measure up made me feel a little rushed so I measured up first).
So, my recommended next step is to…
3. Line up
This just means drawing a line on your wall to use as the guide for hanging your first piece of wallpaper.
Rebel Walls murals should be hung left to right, meaning the first sheet is hung on the left-hand side of the walls so this is where you need to start your measurements from.
Getting the first sheet straight is the single most important thing to get right here! If you live in an old house, you’ll be surprised how wonky your walls actually are!
Measure the width of your first sheet of paper (usually 45cm but do double check) and then take off 1cm off your measurement to allow for any wonkiness of the wall!
Now, starting at the top near the ceiling use a tape measure to measure out 44cm from the left wall and use a pencil to mark it out on the wall. Now make another mark at the bottom of the wall 44cm from the left wall.
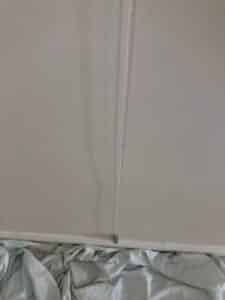
Now hang your plumb line from the mark at the top of the wall and allow the string to settle before using your pencil to mark the wall in the middle and bottom of the wall. I actually placed several pencil marks down the wall along where the plumb line settled as this made it easier to join the marks together to form my guide line.
You should now check all the marks you have on the wall to make sure none of them are more than the 44cm from the left-hand wall. If they are you will need to move your whole line in closer to the left wall to incorporate the difference.
Once you are happy with your measurements – triple check them! – now use a spirit level to join the marks together to form your hanging guideline.
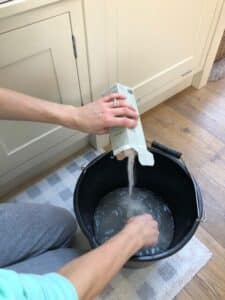
4. Now it’s time to mix up your paste

Follow the instructions on the packet and when it says add it gradually – don’t ignore this! It’s back breaking getting the lumps out when you chuck it all in, in one go! I speak from experience when I first used wallpaper paste last year!
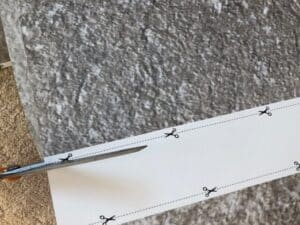
5. Cut your wallpaper strips
Next, it’s time to carefully cut out your wallpaper strips and lay them in the order you’ll be hanging them.
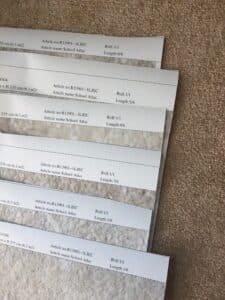
6. Now gather together your paste and pasting tools.
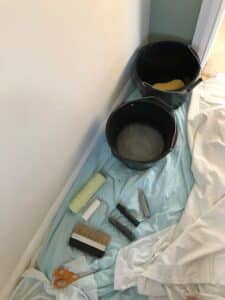
• Step ladder
• Metal ruler if you have one
• Sharp Stanley knife – it’s really important that it’s super sharp.
• Wallpaper brush
• Paint brush
• Screw drive (for plug socket removal)
• Bucket
• Sponge (new!)
• Scissors
• Roller
• Paint tray for roller
7. Paste the wall for your first sheet of paper
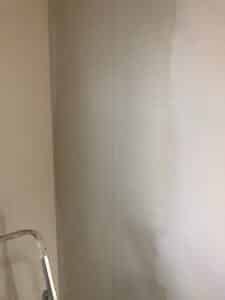
With a roller paste the wall 1 and a half widths across the wall from the left-hand wall. You need the paste to cover the line and more so that it sticks correctly along the join.
Top tips:
Use a paint brush to paste the edges and make sure there is plenty of paste in the corners and along the edges. You can wipe away excess paste very easily once the paper is on the wall but it’s really hard to add extra paste once you’ve placed the paper on the wall.

Make sure you have covered every inch of the wall in paste as any bare patches can lead to bubbles (I speak from experience!).
8. Hanging your first sheet of paper
Now it’s time to hang your first sheet of paper! My heart raced the first time I did this, but it really isn’t hard. Take a deep breath and go for it!
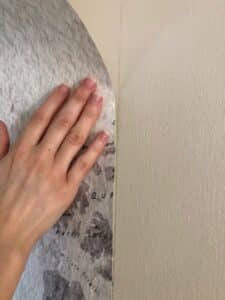
Ensure the bottom of paper is sitting in position as this is your starting point then slowly and gently with your hand begin to line the paper up with your pencil line on the wall. If you don’t get it quite right, don’t worry, simply peel the paper back off the wall and start again. This first sheet really needs to be perfect. If it’s not the rest of the sheets will be wrong too.
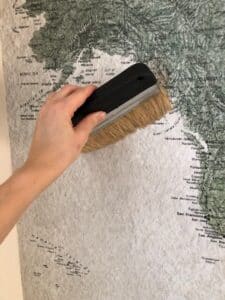
Using a wallpaper brush, gently from the middle of the sheet, brush the paper from centre to edge to remove any air bubbles and help the paper fully stick to the paste.
9. Trimming the edges
Next, it’s time to trim the edges.
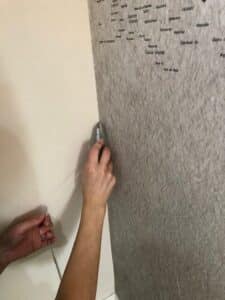
First make sure the paper is completely stuck down in the corners then take your stanley knife and cut along the edge of the wall. You could use a metal ruler to get a perfect line, but I did it free hand as I found it easier.
Then repeat at the top and bottom of the paper.
Top Tip: Use scissors to remove large amounts of excess paper and then finish off with a stanley knife.
And repeat!
10. Plug sockets or light switches
Don’t be afraid of them! It’s a little fiddly but if you take your time, you’ll be fine.
- First, switch off the electrics and then remove the screws holding the socket to the wall.

- Next hang your sheet of paper to the wall.
- With a Stanley knife now cut a small hole in the middle of where the switch is, with scissors make an x and cut diagonally out towards each corner.
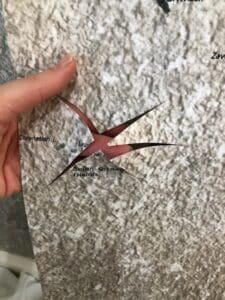
- Next, gently feed the socket through the hole in the paper

- Then you can press the wallpaper against the edges and cut off any excess inside the socket area.
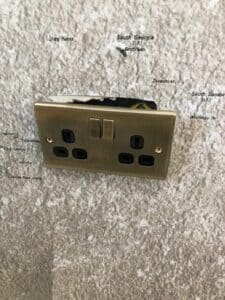
- Press the wallpaper edges down behind the socket with your wallpaper brush and then re-tighten the screws.
11. Now repeat the steps in steps 8 & 9
12. Sponge away any excess paste
Using a lightly dampened sponge (remove as much water as possible) wipe any excess paste from the edges, joins and corners of the paper.
13. Put the kettle on
Or pour yourself a drink! You did it!
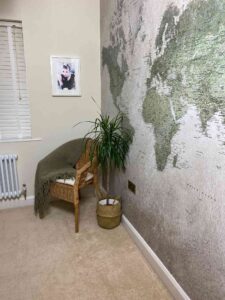
This is called School Atlas by Rebel Walls
This is called Chinoiserie Chic from Rebel Walls
If you are feeling inspired to carry out some DIY my “Beginners guide to panelling a wall” might be of interest to you too.
If you enjoyed reading this blog do scroll to the bottom to subscribe. Once subscribed, you’ll receive an email when a new blog is published so you never miss a blog post again.
Leave a Reply